Category Archives: Teacher Resources

What to Do When Your Device Blue Screens: A Comprehensive Guide

blue screen tn min
bluescreen# min

Encountering a Blue Screen can be alarming and frustrating. Whether you’re using a Windows laptop, a Chromebook, or any other type of device, understanding the steps to take when this happens can help you get back on track quickly. Here’s a guide to help all types of laptop users handle a blue screen issue effectively.

Understanding the Blue Screen

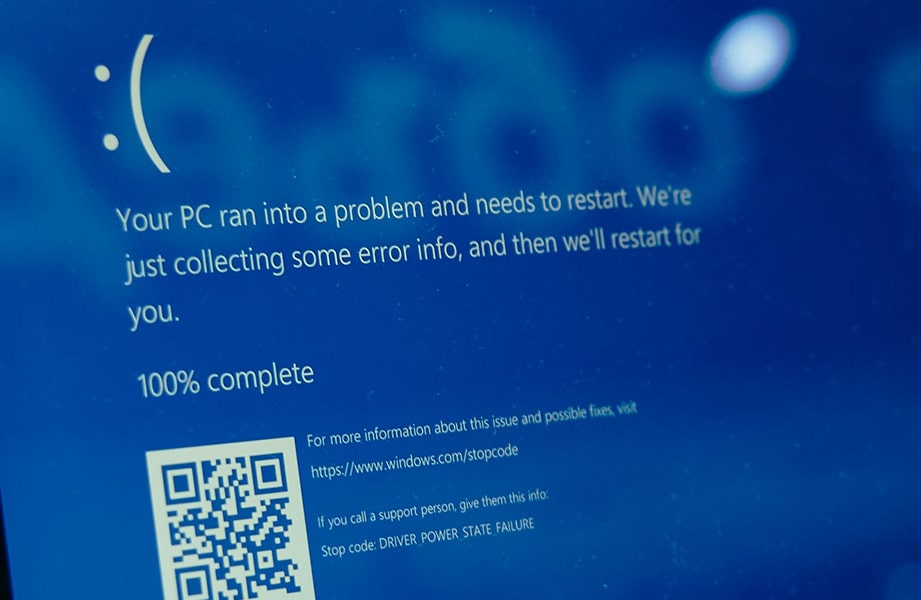
A Blue Screen occurs when Windows encounters a critical error that it cannot recover from, often related to hardware or software issues. The screen typically displays a blue background with white text outlining the error, and the system needs to restart.

Immediate Steps to Take

  1. Note the Error Code: Before the system restarts, take note of the error code displayed on the blue screen. This code can be crucial for diagnosing the issue later.

  2. Restart Your Device: Often, simply restarting your laptop can resolve a temporary glitch. If the Blue Screen reappears, further investigation is needed.

Diagnosing the Issue

  1. Check for Updates:

    • Windows Updates: Ensure that your operating system is up to date. Go to Settings > Update & Security > Windows Update and check for updates. Installing the latest updates can often resolve underlying issues.
    • Driver Updates: Outdated or corrupted drivers are a common cause of a Blue Screen. Use Device Manager to check for driver updates. Right-click on Start, select Device Manager, and look for devices with a yellow exclamation mark. Right-click and select Update driver.
  2. Run a System Scan:

    • Use Windows built-in tools to scan for and repair system issues. Open Command Prompt as an administrator and run the following commands:
       
      sfc /scannow
      • This will scan and repair corrupted system files. 
    • Follow up with:
       
      DISM /Online /Cleanup-Image /RestoreHealth
      • This command will repair the Windows image.
  3. Check for Hardware Issues:

    • Memory Check: Faulty RAM can cause a Blue Screen. Use Windows Memory Diagnostic tool by typing “Windows Memory Diagnostic” in the search bar, running the tool, and following the prompts.
    • Hard Drive Check: Corrupted hard drive sectors can also cause blue screens. Use the Check Disk utility by typing “chkdsk /f /r” in Command Prompt (admin) and restarting your device to scan and repair the hard drive.

Advanced Troubleshooting

  1. Safe Mode:

    • Boot your laptop in Safe Mode to troubleshoot without third-party software interference. Press Shift + Restart to access the advanced startup options, then navigate to Troubleshoot > Advanced options > Startup Settings > Restart. Select Enable Safe Mode from the list.
  2. System Restore:

    • If the Blue Screening started after a recent change, use System Restore to revert your system to a previous state. Search for “System Restore” in the start menu, select a restore point, and follow the instructions.
  3. Check Event Viewer:

    • The Event Viewer can provide detailed logs of the system events leading up to the Blue Screen Search for “Event Viewer” in the start menu, navigate to Windows Logs > System, and look for critical errors around the time of the Blue Screen.

Preventive Measures

  1. Regular Updates: Keep your system, drivers, and applications up to date to prevent compatibility issues and security vulnerabilities.
  2. Antivirus Software: Regularly scan your system with reliable antivirus software to protect against malware that can cause Blue Screens.
  3. Backup Your Data: Regularly back up important files to avoid data loss in case of critical system failures.

When to Seek Professional Help

If you’ve tried all the above steps and still encounter Blue Screens, it might be time to seek professional assistance. Persistent Blue Screen can indicate deeper hardware issues that requires expert diagnosis and repair. You can contact GreenIT Repair Center and submit a ticket here.

Fun LEGO Lessons to Kickstart the School Year: Engaging STEAM Activities with BricQ and SPIKE Prime Sets

lego bts tn min
lego bts min

Welcome back, teachers! As you gear up for another exciting school year, it’s the perfect time to integrate hands-on, engaging activities into your STEAM curriculum. LEGO Education BricQ Motion Prime and SPIKE Prime/Essential sets are fantastic tools to help students explore concepts in science, technology, engineering, arts, and mathematics through interactive learning. Here are some fun and educational LEGO activities to kick off the new school year.

1. BricQ Motion Prime: Forces and Motion in Sports

  • Lesson Idea: Propeller Car Challenge
    • Objective: Introduce students to the basics of forces and motion by having them design and build a propeller car.
    • Activity: Using the BricQ Motion Prime set, students will construct a car powered by a propeller. They will test different designs to see which travels the farthest and fastest, learning about the impact of force, mass, and aerodynamics.
    • Skills Developed: Understanding Newton’s laws of motion, data analysis, and iterative design​

2. SPIKE Prime: Coding and Robotics

  • Lesson Idea: Color Sorting Robot
    • Objective: Teach students basic programming and robotics by building a color-sorting robot.
    • Activity: Students use the SPIKE Prime set to create a robot that can detect and sort different colored objects using the color sensor. This involves programming the robot using the SPIKE App to identify colors and execute sorting actions.
    • Skills Developed: Coding, problem-solving, and understanding sensor technology​.

3. BricQ Motion Essential: Simple Machines and Physics

  • Lesson Idea: Gymnastics Motion
    • Objective: Explore the principles of balance, force, and motion through a gymnastics-themed activity.
    • Activity: Students will build a gymnast model that can perform flips and spins. They will experiment with different forces and angles to understand how these affect the gymnast’s movement.
    • Skills Developed: Experimentation, critical thinking, and understanding physical forces​.

4. Collaborative Learning with SPIKE Essential

  • Lesson Idea: Storytelling with Robotics
    • Objective: Combine literacy and engineering by having students create a story that involves robotic characters.
    • Activity: In groups, students will write a short story and use SPIKE Essential to build and program robots that act out scenes from their story. This helps in developing narrative skills and integrating technology with storytelling.
    • Skills Developed: Collaboration, creativity, programming, and literacy integration​.

5. Cross-Curricular Projects

  • Lesson Idea: Science of Sports
    • Objective: Apply scientific concepts to real-world sports scenarios to make learning more engaging and relevant.
    • Activity: Using the BricQ Motion Prime set, students can simulate different sports activities, such as skiing or a free kick in soccer, to study the effects of force and motion. They can then analyze their findings and present their results.
    • Skills Developed: Application of science in everyday life, analytical skills, and presentation skills​.

These activities not only make learning fun but also provide a strong foundation in STEAM subjects. By starting the school year with engaging, hands-on projects, you can inspire curiosity and enthusiasm in your students, setting a positive tone for the months ahead.

For more detailed lesson plans and resources, visit the LEGO Education website and explore the various materials available to enhance your classroom experience.

Check Out Our Range Of LEGO BricQ and SPIKE Sets

Simplify School IT with Apple Management: Efficient Solutions for Bulk Tasks

am tn
am

Managing technology in an educational environment can be daunting, especially when it comes to maintaining and deploying devices across a large number of students and teachers. Apple Management streamlines this process, making it significantly easier to handle tasks such as bulk installing apps on multiple devices. Here’s an overview of what Apple Management is and how it can revolutionize IT management in schools.

What is Apple Management?

Apple Management refers to the use of specialised tools and protocols to oversee and maintain Apple devices such as iPads, Macs, and iPhones. These tools include Apple School Manager, Mobile Device Management (MDM) solutions, and the Volume Purchase Program (VPP). Together, these systems allow for centralised control over device configurations, app installations, updates, and security settings.

Key Benefits of Apple Management

  1. Centralised Control: With Apple Management, IT administrators can oversee all devices from a single dashboard, streamlining updates and maintenance tasks.
  2. Bulk App Installation: Deploy apps and configurations to hundreds of devices simultaneously, eliminating the need to manually install software on each device.
  3. Enhanced Security: Ensure all devices comply with school security policies, with the ability to remotely lock or wipe devices if needed.
  4. Efficient Updates: Push out software and security updates to all devices at once, ensuring everyone has the latest tools and protections.
  5. Customisation: Tailor the user experience on each device based on grade level or individual needs, enhancing the educational experience.

Case Study: How GreenIT Transformed Tech Management for Irish Primary Schools

Recently, GreenIT partnered with an Irish Primary School to implement an Apple Management system for their fleet of 500 iPads and 200 MacBooks. Before this, the school’s IT staff spent countless hours manually installing apps, updating software, and managing security settings on each device. This not only drained valuable time but also delayed the deployment of new educational tools.

The Challenge: This Primary School needed an efficient way to manage their growing number of Apple devices, ensuring that all students and teachers had the necessary apps and updates without overwhelming the IT department.

Our Solution: GreenIT introduced a comprehensive Apple Management system, utilising Apple School Manager and an MDM solution. This allowed the Primary Schools’ IT team to:

  • Enroll devices into the management system quickly and easily.
  • Deploy apps in bulk to all devices in a matter of minutes.
  • Schedule regular updates to minimise classroom disruptions.
  • Maintain consistent security settings across all devices.

The Results: Within the first month, this Primary School saw a dramatic reduction in the time spent on device management. What once took several days to accomplish now took just a few hours. The IT staff could focus more on supporting educational outcomes rather than performing tedious maintenance tasks. Teachers and students benefited from having immediate access to the latest educational apps and tools.

Why Choose GreenIT?

At GreenIT, we understand the unique challenges that educational institutions face in managing their technology. Our expertise in Apple Management can help your school achieve the same efficiency and effectiveness as other Primary Schools. By partnering with us, you can ensure your devices are always up-to-date, secure, and ready for use, allowing you to focus on what matters most – educating your students.

Contact Us Today!

Ready to streamline your school’s IT management? Contact GreenIT at 045 409 150 to learn how we can help get your school up and running with Apple Management. Let us handle the tech, so you can focus on teaching

Check Out Our Range of Apple Devices

Windows Laptops vs. Chromebooks for Irish Students: Which is Best for School?

chromebooks tn min
chromebooks min

As technology becomes an integral part of education, choosing the right device for students is crucial. Windows laptops and Chromebooks are two popular options, each with its own strengths and weaknesses. This blog post will explore the benefits and drawbacks of both, with a slight lean towards Chromebooks, which can often be the more suitable choice for school environments.

Windows Laptops: Versatility and Power

Pros:

  1. Software Compatibility: Windows laptops support a vast array of software, including professional-grade applications like Adobe Creative Suite, Microsoft Office, and various specialized educational programs. This makes them highly versatile for students who need to run specific software for their courses.
  2. Performance: Windows laptops generally offer more powerful hardware options, from high-speed processors to extensive RAM and storage capacities. This makes them suitable for tasks that require more computing power, such as video editing or running complex simulations.
  3. Offline Functionality: Windows laptops can run applications offline without any issues, which is beneficial in areas with unstable internet connectivity.

Cons:

  1. Cost: Windows laptops tend to be more expensive than Chromebooks, both in terms of initial purchase price and maintenance costs.
  2. Maintenance and Management: These devices can be more complex to manage and maintain, often requiring more technical support to handle software updates, virus protection, and troubleshooting issues.

Chromebooks: Simplicity and Manageability

Pros:

  1. Ease of Management: Chromebooks are designed to be managed easily. Through Google Admin Console, IT administrators can set up, manage, and secure devices across the entire school. This is particularly beneficial for ensuring that all students have access to the same apps and resources.
  2. Affordability: Chromebooks are generally more affordable than Windows laptops. They offer a cost-effective solution without compromising on essential functionalities required for education.
  3. Security: Chromebooks are inherently secure with built-in virus protection and automatic updates. This reduces the burden on IT staff and ensures that the devices remain safe from malware.
  4. Battery Life: These devices typically have longer battery life compared to Windows laptops, allowing students to use them throughout the school day without needing to recharge.
  5. Cloud Integration: Chromebooks are designed to work seamlessly with Google Workspace for Education. This includes apps like Google Classroom, Docs, Sheets, and Slides, which are widely used in schools for collaborative learning and assignments.

Cons:

  1. Limited Software: Chromebooks primarily run web-based applications and may not support all software programs that Windows laptops can. This might be a limitation for students needing specific desktop applications.
  2. Offline Use: Although many Google apps now offer offline functionality, Chromebooks are still heavily reliant on internet connectivity for full functionality.

Dual Operating Systems on Chromebooks

Some newer Chromebook models offer a dual operating system capability, allowing them to run both Chrome OS and a Linux-based system. This expands their versatility, enabling the use of more complex applications that are not available on Chrome OS alone. However, this feature is not yet standard on all Chromebooks and might require additional configuration.

Case for Chromebooks in Irish Schools

Given the context of Irish schools, where students primarily use devices for accessing educational apps, participating in online classes, and completing assignments, Chromebooks present a compelling option:

  • Uniformity: With Chromebooks, teachers can ensure that every student has access to the same apps and resources, facilitating uniformity in teaching and learning.
  • Cost-Effectiveness: The affordability of Chromebooks makes them accessible for a larger number of students, helping to bridge the digital divide.
  • Simplified IT Management: Schools can manage all devices easily, deploy updates, and maintain security with minimal effort.

The Right Choice for Your School

While Windows laptops offer powerful performance and extensive software compatibility, Chromebooks stand out for their ease of management, affordability, and suitability for educational environments. They provide a streamlined, secure, and cost-effective solution that aligns well with the needs of students and schools today.

Contact GreenIT Today!

If you are a parent looking to purchase a laptop for your child or a school administrator seeking bulk deals and tailored tech solutions, GreenIT is here to help. Contact us at 045 409 150 to learn more about how we can provide the best devices and support for your educational needs. Let’s work together to ensure every student has the technology they need to succeed.

Getting Your Laptop School-Ready: A GreenIT Guide to Physical Cleaning

cleaning tn min
cleaning min

As the new school year approaches, it’s the perfect time to give your laptop a thorough clean. A clean laptop not only looks better but can also function more efficiently and last longer. At GreenIT, we understand the importance of maintaining your devices in top condition. Follow this guide to ensure your laptop is spotless and ready for the academic year ahead.

1. Cleaning the Screen

The screen is one of the most important parts of your laptop, and keeping it clean is crucial for a clear, comfortable viewing experience.

What You Need:

  • Screen wipes specifically designed for electronics or a microfiber cloth
  • Screen cleaning solution (if using a microfiber cloth)

How to Clean:

  1. Turn off the Laptop: Ensure your laptop is powered off and unplugged.
  2. Wipe Gently: Use screen wipes or lightly dampen a microfiber cloth with screen cleaning solution.
  3. Wipe in Circular Motions: Gently wipe the screen in small, circular motions to avoid streaks and ensure thorough cleaning.
  4. Dry the Screen: If any moisture remains, use a dry part of the microfiber cloth to gently wipe it away.

2. Cleaning the Keyboard

The keyboard is a hotspot for dust, crumbs, and bacteria. Keeping it clean is essential for hygiene and functionality.

What You Need:

  • Soft brush or compressed air
  • Keyboard cleaning gel or putty (optional)
  • Antibacterial wipes

How to Clean:

  1. Turn off the Laptop: As always, start by powering off and unplugging your laptop.
  2. Remove Debris: Use a soft brush or compressed air to remove dust and debris from between the keys.
  3. Deep Clean (Optional): For a deeper clean, use keyboard cleaning gel or putty to lift dirt and grime.
  4. Wipe the Keys: Use antibacterial wipes to clean the surface of the keys. Make sure the wipes are only slightly damp to avoid moisture getting into the keyboard.

3. Cleaning USB Ports and Other Openings

Dust and debris can accumulate in USB ports and other openings, potentially causing connectivity issues.

What You Need:

  • Small, soft brush or a toothbrush
  • Compressed air

How to Clean:

  1. Turn off the Laptop: Ensure your laptop is powered off and unplugged.
  2. Brush Out Debris: Use a small, soft brush or a toothbrush to gently clean the inside of USB ports and other openings.
  3. Use Compressed Air: For any remaining dust, use short bursts of compressed air to blow it out.

4. Cleaning the Exterior

Keeping the exterior of your laptop clean not only makes it look better but also removes bacteria and prevents the build-up of grime.

What You Need:

  • Microfiber cloth
  • Mild cleaning solution (water and a small amount of dish soap)
  • Antibacterial wipes

How to Clean:

  1. Turn off the Laptop: Make sure your laptop is off and unplugged.
  2. Wipe with Solution: Dampen a microfiber cloth with a mild cleaning solution (water and a tiny bit of dish soap) and gently wipe down the exterior.
  3. Use Antibacterial Wipes: For added cleanliness, use antibacterial wipes on the areas you frequently touch, like the palm rest and the touchpad.
  4. Dry Thoroughly: Ensure all surfaces are dry before turning your laptop back on.

5. General Tips

  • Avoid Excess Moisture: Always use slightly damp cloths and wipes to prevent moisture from seeping into the laptop.
  • Be Gentle: Use gentle pressure to avoid damaging delicate parts.
  • Regular Cleaning: Make cleaning your laptop a regular habit to maintain its appearance and performance.


A clean laptop not only looks great but also functions better, providing a healthier environment for your schoolwork. By following this GreenIT guide, you can ensure your laptop is in top shape for the upcoming academic year. Regular maintenance and cleaning will help extend the life of your device, keeping it performing at its best.

For more tips on maintaining your technology or if you need professional assistance for damage or repair, don’t hesitate to Contact GreenIT We’re here to help keep your devices in top shape!

Enhance Early Childhood Education with Interactive Technology from Promethean

crop early learn min
early learn min

Early childhood education is critical for children’s development and future academic success. It’s a time when they acquire important social, emotional, and cognitive skills, as well as an opportunity to learn how to interact with their peers, teachers, and parents.

Having interactive displays in preschools and daycares offers young children the chance to familiarize themselves with the technology they’ll be using in elementary school and beyond. And it offers an entryway into academics using interactive games and engaging lessons that spark their imagination and encourage creativity.

Take a look at some of the ways Promethean’s award-winning ActivPanel and Explain Everything software can transform early childhood education:

  • Get a jumpstart on academics – Apps and games specifically designed for preschool-age children help them learn basic literacy and numeracy skills.
  • Create engaging lessons – Teachers can use the built-in Explain Everything Whiteboard, games, videos, and more to encourage engagement.
  • Promote teamwork and collaboration – Children learn social interaction skills by coming up to the panel and problem-solving together.
  • Expand their worlds – Activities such as virtual fieldtrips, art projects, music lessons, and interactive storytelling take children to new, fascinating places.
  • Bring parents along – By allowing parents to access the same web applications as their children use, they can take a more active role in the learning process.

Why Choose Promethean For Your Interactive Technology Needs

Promethean hardware and software solutions are easy to use and require minimal training to get up and running fast. And you can rest assured that you’re making an investment in technology that will last far into the future.

  • Durable – The ActivPanel is built with high-quality materials, including toughened glass that can withstand daily use in any childcare setting.
  • Safe – Our hardware products are safe for young children to use, so you can let them touch and explore freely without worrying about damage or injuries.
  • Secure – Promethean maintains comprehensive privacy practices and employs multiple security measures to keep personal data safe.
  • Supportive – With a five-year warranty, 24/7 support, and multiple training options, you can be sure we’ll be there for you every step of the way.

This blog post is brought to you by Promethean in collaboration with GreenIT.

How to Make Your Windows Computer Faster : Tips & Tricks

windows pc tn min
windows pc min

At GreenIT, we take pride in refurbishing devices to a standard that makes them feel like new. However, even the most meticulously restored computer can slow down over time with regular use. If your Windows PC is starting to feel sluggish, don’t worry! We’ve compiled some simple and effective tips to help you restore its performance.

Disk Cleanup

Over time, your computer accumulates a lot of unnecessary files — think temporary files, system cache, and leftover data from uninstalled programmes. These can clutter your hard drive and slow down your system.

How to Perform Disk Cleanup:

  1. Open Disk Cleanup Tool: Type “Disk Cleanup” into the Start menu search bar and select the tool from the results.
  2. Select Drive: Choose the drive you want to clean (usually C:).
  3. Analyse Files: Disk Cleanup will scan your system and display a list of file types that can be safely deleted.
  4. Select and Delete: Tick the boxes next to the file types you want to remove and click “OK.” Confirm the deletion.

This simple step can free up space and reduce the load on your system, providing an immediate performance boost.

Defragment Your Hard Drive

If your PC uses a traditional hard drive (HDD), defragmenting it can significantly enhance performance. Fragmentation occurs when files are scattered across different parts of the drive, making it harder for the system to read them efficiently.

Steps to Defragment:

  1. Access Defragmentation Tool: Type “Defragment and Optimize Drives” into the Start menu search bar.
  2. Analyse the Drive: Select the drive you want to defragment and click “Analyse.”
  3. Defragment: If the analysis shows significant fragmentation, click “Optimise” to start the defragmentation process.

Note: If you have a Solid-State Drive (SSD), skip this step. SSDs don’t benefit from defragmentation and might even be harmed by it.

Uninstall Unnecessary Programs

Unused programmes can take up valuable space and slow down your computer. Reviewing and removing these programmes can help streamline your system.

How to Uninstall:

  1. Open Control Panel: Type “Control Panel” into the Start menu search bar.
  2. Go to Programmes and Features: Select “Uninstall a program.”
  3. Review and Remove: Look through the list of installed programmes and uninstall those you no longer need by selecting them and clicking “Uninstall.”

Manage Startup Programs

Some applications start automatically when you boot up your PC, which can significantly slow down your startup time. Limiting these can help your computer boot faster and run more smoothly.

Steps to Manage Startup Programmes:

  1. Open Task Manager: Press Ctrl + Shift + Esc to open Task Manager.
  2. Navigate to Startup Tab: Click on the “Startup” tab to see a list of programmes that launch on startup.
  3. Disable Unnecessary Programmes: Right-click on the programmes you don’t need at startup and select “Disable.”

Update Windows and Drivers

Keeping your operating system and drivers updated ensures that your PC runs with the latest performance improvements and security patches.

How to Update:

  1. Check for Windows Updates: Go to Settings > Update & Security > Windows Update and click “Check for updates.”
  2. Update Drivers: You can use Device Manager to update drivers manually or use a trusted third-party tool to simplify the process.

Scan for Malware

Malware can significantly impair your computer’s performance. Running regular scans can help keep your system secure and running smoothly.

How to Scan for Malware:

  1. Use Windows Defender: Go to Settings > Update & Security > Windows Security and run a full scan.
  2. Consider Third-Party Antivirus: For more thorough protection, you might use additional antivirus software.

Upgrade Your Hardware

Sometimes, software tweaks aren’t enough. If your computer continues to lag, consider a hardware upgrade. Adding more RAM or switching to an SSD can provide a significant speed boost.

Common Hardware Upgrades:

  • Increase RAM: More memory allows your computer to handle more tasks simultaneously.
  • Switch to an SSD: SSDs are much faster than traditional HDDs and can drastically reduce boot and load times.

At GreenIT, we refurbish computers to ensure they meet high standards of quality and performance. However, even the best machines can slow down over time with everyday use. By following these steps, you can keep your Windows PC running smoothly and efficiently. Regular maintenance is key to a long-lasting, high-performing computer.

For more tips or if you need professional assistance, don’t hesitate to contact GreenIT. We’re here to help keep your technology in top shape!


Troubleshooting Common iPad Issues: Easy Fixes

ipad tn
ipad

At GreenIT, we understand how integral your iPad is to your daily life, whether for work, school, or entertainment. However, like any tech device, iPads can encounter issues from time to time. Fortunately, many of these problems have simple solutions that you can try at home. In this blog post, we’ll explore the most common iPad issues and provide easy fixes to get your device back in top shape.

1. iPad Won’t Turn On

Common Cause: This issue can be due to a drained battery, software glitches, or hardware problems.

Easy Fixes:

  • Charge Your iPad: Connect your iPad to a power source using the original charger and cable. Allow it to charge for at least 15-30 minutes before attempting to turn it on again.
  • Force Restart: If charging doesn’t work, try a force restart. Press and hold the Home button (for iPads with a Home button) and the Power button simultaneously until the Apple logo appears. For newer models without a Home button, press and quickly release the Volume Up button, press and quickly release the Volume Down button, then press and hold the Power button until the Apple logo appears.

2. iPad Running Slowly

Common Cause: Over time, apps and processes can slow down your iPad’s performance.

Easy Fixes:

  • Close Background Apps: Double-click the Home button or swipe up from the bottom of the screen to see all open apps. Swipe up on each app to close it.
  • Clear Cache: Go to Settings > Safari > Clear History and Website Data to remove cached data that might be slowing down your device.
  • Restart Your iPad: Sometimes, a simple restart can resolve performance issues. Press and hold the Power button, then slide to power off. Turn it back on after a few seconds.

3. Wi-Fi Connectivity Issues

Common Cause: Network issues, router problems, or software glitches can cause Wi-Fi connectivity issues.

Easy Fixes:

  • Toggle Wi-Fi: Go to Settings > Wi-Fi, turn off Wi-Fi, wait a few seconds, and then turn it back on.
  • Restart Your Router: Unplug your router, wait for about 30 seconds, and plug it back in. Allow it to fully restart, then reconnect your iPad.
  • Forget and Reconnect: Go to Settings > Wi-Fi, tap on your network, then tap “Forget This Network.” Reconnect by selecting the network again and entering your password.

4. iPad Not Charging

Common Cause: This can be due to a faulty cable, charger, or port.

Easy Fixes:

  • Inspect the Cable and Charger: Check for any visible damage to the cable or charger. If possible, try using a different cable and charger to see if the issue persists.
  • Clean the Charging Port: Dust and debris can accumulate in the charging port, preventing a proper connection. Use a soft brush or a can of compressed air to gently clean the port.
  • Restart Your iPad: Sometimes, restarting your device can resolve charging issues. Follow the steps mentioned above for restarting your iPad.

5. Unresponsive Screen

Common Cause: An unresponsive screen can be due to software glitches or physical damage.

Easy Fixes:

  • Remove Screen Protector: If you have a screen protector, it might be interfering with touch sensitivity. Try removing it to see if the screen becomes responsive.
  • Force Restart: As described earlier, perform a force restart to resolve temporary software glitches.
  • Update iOS: Go to Settings > General > Software Update to check for any available updates. Installing the latest iOS version can fix bugs and improve performance.

When to Seek Professional Help

While these fixes can resolve many common iPad issues, some problems might require professional attention. If your iPad continues to experience issues despite trying these solutions, it’s best to consult with a professional repair service like GreenIT. We offer expert diagnostics and repairs to ensure your device functions optimally as long as they were purchased from us.

Your iPad is a valuable tool, and keeping it in good working order is essential. By understanding common issues and their easy fixes, you can often troubleshoot problems on your own. At GreenIT, we’re always here to help with more complex issues or provide professional repair services when needed. Don’t hesitate to reach out to us.

Unlocking Learning with LEGO Education Sets: Cost-Effective Solutions for Schools

lego education greenit tn min
lego education greenit

Everyday we’re met with exciting opportunities for hands-on learning, particularly through LEGO Education sets. However, there’s a slight hitch – the latest 2024 sets come at an increased cost, posing a challenge for budget-conscious schools. But fear not! For your school, we’ve got a solution that allows schools to enjoy the benefits of LEGO Education without breaking the bank. Let’s dive into why LEGO Education sets are invaluable for primary schools in Ireland and how opting for 2023 sets can be a savvy financial move.

The Benefits of LEGO Education in Primary Schools

LEGO Education sets are not just toys; they’re powerful educational tools that foster creativity, problem-solving skills, and collaborative learning amongst students. In primary schools across Ireland, these sets have become indispensable resources for teachers looking to engage students in STEM (Science, Technology, Engineering, and Mathematics) subjects in a fun and interactive manner. By building and experimenting with LEGO bricks, students develop critical thinking skills and gain a deeper understanding of abstract concepts, making learning an enjoyable experience.

Cost-Effective Solutions: Opting for 2023 Sets

While the allure of the latest LEGO Education sets may be tempting, the increased cost can strain school budgets, especially if your school is not able to obtain things like the recent ICT Grant in April. However, there’s no need to compromise on quality or educational value. By choosing to invest in 2023 LEGO Education sets, schools can enjoy substantial savings without sacrificing the benefits of hands-on learning. These sets offer the same educational value and versatility as their newer counterparts, making them a practical choice for schools seeking cost-effective solutions.

Unlocking Learning Potential with LEGO Education

At GreenIT, we recognise the immense value that LEGO Education sets bring to the classroom. From enhancing problem-solving skills to fostering creativity and collaboration, these sets empower students to become active participants in their own learning journey. Whether it’s exploring concepts in mathematics, science, engineering, or coding, LEGO Education sets provide endless opportunities for students to engage with curriculum content in meaningful and memorable ways.

Embracing Learning Through LEGO

LEGO Education sets offer a dynamic and engaging approach to learning that resonates with students of all ages. While the cost of 2024 sets may pose a challenge for schools, opting for 2023 sets presents a practical solution that allows schools to maximise their educational resources while staying within budget. At GreenIT, we’re committed to providing educators with the tools and resources they need to unlock the full potential of every student. With LEGO Education sets, the possibilities for learning are limitless, and the journey to knowledge is as exciting as it is enriching.

Check Out Our Catalogue Of LEGO Education Sets Now!

Common Chromebook Issues and Easy Fixes

chrb min
chromebook a min

While Chromebooks are designed to be user-friendly and reliable, teachers may still encounter occasional technical issues that can interrupt classroom activities. This section provides practical solutions for some of the most common Chromebook problems, ensuring that you can quickly resolve any issues and keep your lessons running smoothly.

1. Chromebook Won’t Turn On

  • Issue: The Chromebook appears to be dead, with no lights or display activity.
  • Fix: Connect the Chromebook to a charger and ensure it is plugged into a working outlet. Wait a few minutes to see if the charging light comes on. If the device still doesn’t power up, try a hard reset by holding down the Refresh button and the Power button simultaneously for about 10 seconds.

2. Slow Performance

  • Issue: The Chromebook is running slowly, affecting productivity.
  • Fix: Close unnecessary tabs and apps to free up system resources. Check for system updates by going to Settings > About Chrome OS > Check for updates, and install any available updates. Clearing browsing data can also help; go to Chrome settings > Privacy and security > Clear browsing data.

3. Internet Connection Problems

  • Issue: The Chromebook cannot connect to Wi-Fi.
  • Fix: Ensure the Wi-Fi is turned on and the Chromebook is within range of the router. Restart the router and the Chromebook. Forget the network (Settings > Network > Wi-Fi > Forget), then reconnect by entering the password again. If issues persist, check with your IT department to ensure there are no network issues.

4. Keyboard or Trackpad Not Working

  • Issue: The keyboard or trackpad is unresponsive.
  • Fix: Restart the Chromebook to see if the issue resolves itself. If not, perform a hard reset (Refresh + Power button). For persistent issues, check if an external keyboard or mouse works, which can help determine if the problem is hardware-related.

5. Audio Issues

  • Issue: No sound or distorted sound from the Chromebook.
  • Fix: Check the volume settings to ensure it is not muted or too low. Restart the device. If the problem continues, try using headphones to see if the issue is with the speakers. Update the audio drivers by going to Settings > About Chrome OS > Check for updates.

Mmm! Cookies...

Our website uses cookies to improve your browsing experience. We'll assume you're ok with this if you stay or continue exploring our website.