


Latest News, Teacher Resources
Getting Your Laptop School-Ready: A GreenIT Guide to Physical Cleaning
As the new school year approaches, it’s the perfect time to give your laptop a thorough clean. A clean laptop not only looks better but can also function more efficiently and last longer. At GreenIT, we understand the importance of maintaining your devices in top condition. Follow this guide to ensure your laptop is spotless and ready for the academic year ahead.
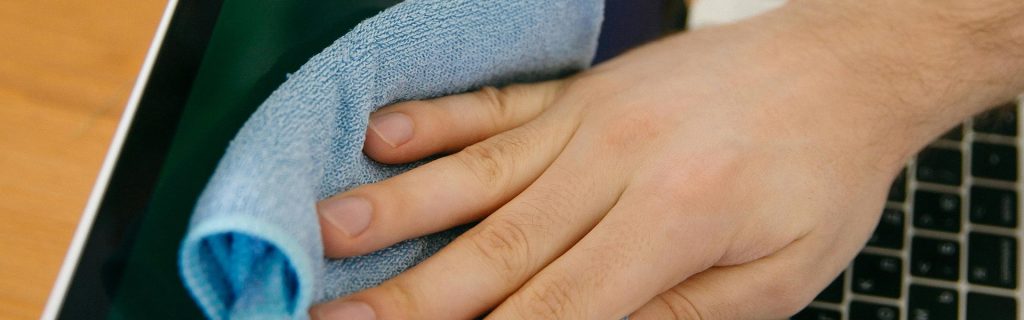
1. Cleaning the Screen
The screen is one of the most important parts of your laptop, and keeping it clean is crucial for a clear, comfortable viewing experience.
What You Need:
- Screen wipes specifically designed for electronics or a microfiber cloth
- Screen cleaning solution (if using a microfiber cloth)
How to Clean:
- Turn off the Laptop: Ensure your laptop is powered off and unplugged.
- Wipe Gently: Use screen wipes or lightly dampen a microfiber cloth with screen cleaning solution.
- Wipe in Circular Motions: Gently wipe the screen in small, circular motions to avoid streaks and ensure thorough cleaning.
- Dry the Screen: If any moisture remains, use a dry part of the microfiber cloth to gently wipe it away.
2. Cleaning the Keyboard
The keyboard is a hotspot for dust, crumbs, and bacteria. Keeping it clean is essential for hygiene and functionality.
What You Need:
- Soft brush or compressed air
- Keyboard cleaning gel or putty (optional)
- Antibacterial wipes
How to Clean:
- Turn off the Laptop: As always, start by powering off and unplugging your laptop.
- Remove Debris: Use a soft brush or compressed air to remove dust and debris from between the keys.
- Deep Clean (Optional): For a deeper clean, use keyboard cleaning gel or putty to lift dirt and grime.
- Wipe the Keys: Use antibacterial wipes to clean the surface of the keys. Make sure the wipes are only slightly damp to avoid moisture getting into the keyboard.
3. Cleaning USB Ports and Other Openings
Dust and debris can accumulate in USB ports and other openings, potentially causing connectivity issues.
What You Need:
- Small, soft brush or a toothbrush
- Compressed air
How to Clean:
- Turn off the Laptop: Ensure your laptop is powered off and unplugged.
- Brush Out Debris: Use a small, soft brush or a toothbrush to gently clean the inside of USB ports and other openings.
- Use Compressed Air: For any remaining dust, use short bursts of compressed air to blow it out.
4. Cleaning the Exterior
Keeping the exterior of your laptop clean not only makes it look better but also removes bacteria and prevents the build-up of grime.
What You Need:
- Microfiber cloth
- Mild cleaning solution (water and a small amount of dish soap)
- Antibacterial wipes
How to Clean:
- Turn off the Laptop: Make sure your laptop is off and unplugged.
- Wipe with Solution: Dampen a microfiber cloth with a mild cleaning solution (water and a tiny bit of dish soap) and gently wipe down the exterior.
- Use Antibacterial Wipes: For added cleanliness, use antibacterial wipes on the areas you frequently touch, like the palm rest and the touchpad.
- Dry Thoroughly: Ensure all surfaces are dry before turning your laptop back on.
5. General Tips
- Avoid Excess Moisture: Always use slightly damp cloths and wipes to prevent moisture from seeping into the laptop.
- Be Gentle: Use gentle pressure to avoid damaging delicate parts.
- Regular Cleaning: Make cleaning your laptop a regular habit to maintain its appearance and performance.
A clean laptop not only looks great but also functions better, providing a healthier environment for your schoolwork. By following this GreenIT guide, you can ensure your laptop is in top shape for the upcoming academic year. Regular maintenance and cleaning will help extend the life of your device, keeping it performing at its best.
For more tips on maintaining your technology or if you need professional assistance for damage or repair, don’t hesitate to Contact GreenIT We’re here to help keep your devices in top shape!